Feeds:
Posts
Comments

Practicum Projects

It has been almost a month since Practicum, one of my favourite arts and sciences events. I’m still feeling a bit of a glow. I didn’t take any classes myself, but I taught (or co-taught) three, and did a crafty children’s thing.

My first class was on board games, which was pretty straightforward as I simply set out a selection of games and people were welcome to come and play. I ended up getting thoroughly skunked at nine-men’s morris by a bright young man of about 10. Shove groat turned out to be his sister’s favourite.

Next up was a round table discussion with the Dark Ages Recreation Company about how we do historical interpretation. As usual, we hadn’t gotten ourselves terribly well organized in advance, though Darrell had put together an introductory slide show. As usual, we bounced off each other seamlessly, talking about how we developed personas and have worked as a group so often that our stories and our real-life personalities blend together into a common history, which adds to the authenticity when we present.

My last class was the history of slave uprisings in the Americas before 1600. This is still such a big topic that I struggle to keep to time and not lose anyone in the details, but I did manage to make a rudimentary map to show key locations and the questions led to some really interesting discussions. I had just finished reading a biography of the first well-known English slave trader, so I also had some new insights that I will go back and add to my post on this topic.

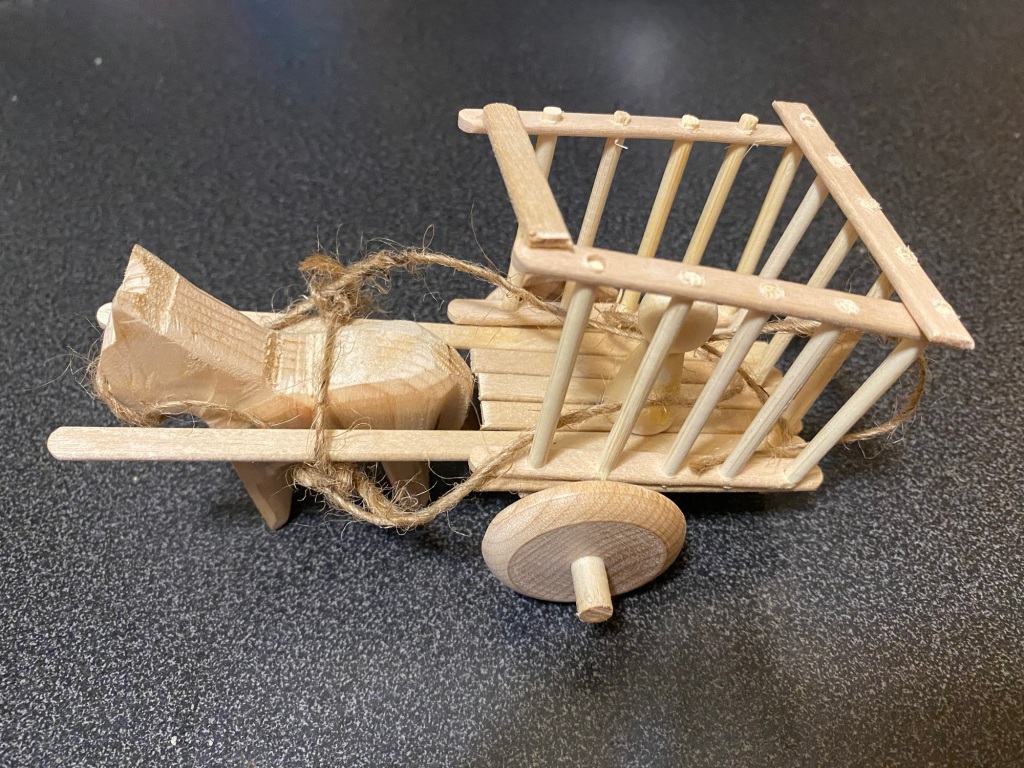
My craft activity of the day was building a little wagon. This had been a children’s activity at the Pelican vigil of my friends Martin and Emma. I had been unable to attend because of multiple COVID exposures the week before their elevation, so it was lovely to spend time with them.

Wooden wagon made of stir sticks, pulled by a wooden horse. There is a small wooden person inside the wagon, holding the reins.

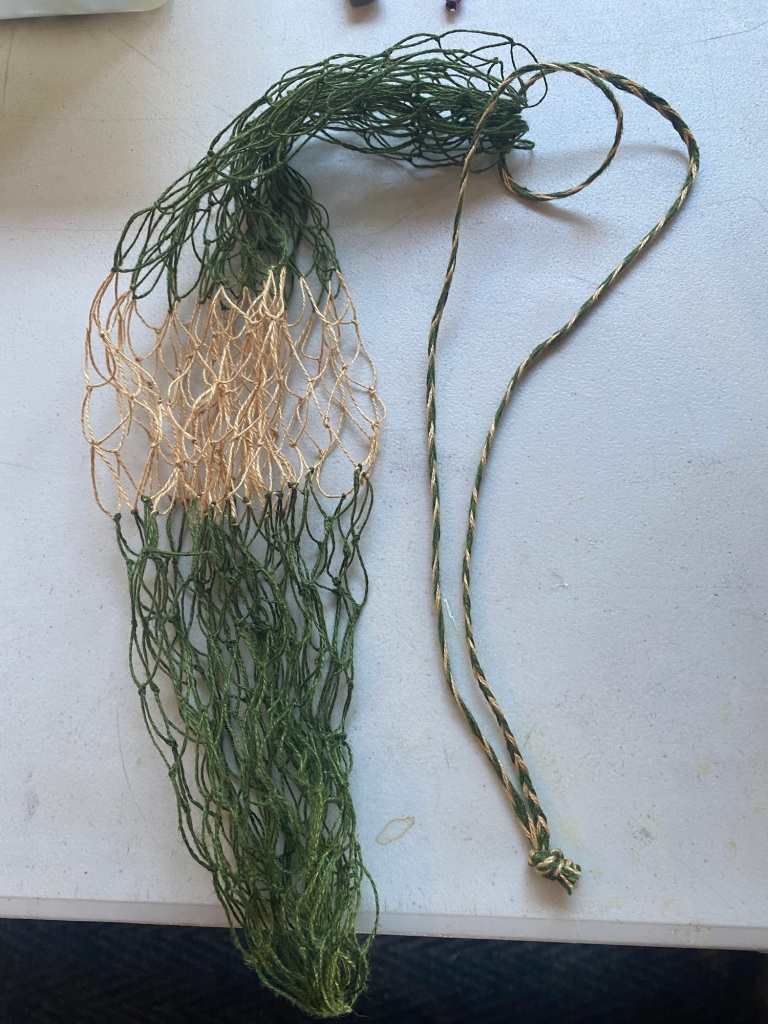
It was also the day I handed over a net bag I had made for the Ealdormere gift bag going to Gulf Wars. It has been ages since I did any netting, so it felt very satisfying.

Netted green and yellow bag with a braided drawstring

According to Wikipedia, Peking Duck, originally named “shāo yāzi” (燒鴨子), was mentioned in the Complete Recipes for Dishes and Beverages (飲膳正要) manual in 1330 by Hu Sihui (忽思慧), an inspector of the imperial kitchen.[2][3] The Peking roast duck that came to be associated with the term was fully developed during the later Ming dynasty,[1][4][5] and by then, Peking duck was one of the main dishes on imperial court menus.[6]The first restaurant specialising in Peking duck, Bianyifang, was established in the Xianyukou, close to Qianmen of Beijing in 1416.[7]

I couldn’t find a recipe under the name shao yazi in Soup for the Qan, which is the English translation of Hu Sihui’s manual. I did find a recipe for roast wild goose (or cormorant or duck), and another for broiled yellow hen that I think would result in the crispy skin that is so typical of Peking Duck. The hen recipe also has spices that would give a flavour profile approaching that of my duck. In contrast, the roasted goose recipe relies on onions, ground coriander and salt, with possibly some unnamed spices, and the whole bird is cooked inside a sheep’s stomach.

I have eaten at Bianyifang! Or at least at one of its branch restaurants. It was my first time trying Peking Duck, in about 1996.

I used a modern recipe for Peking Duck, which was not truly authentic but worked well for my kitchen and time availability. For the pancakes, I used this recipe: Chinese Mandarin Pancakes.

Blue and white plate with two small pancakes. The upper one is flat and topped with slices of duck with matchstick pieces of cucumber, carrot and green onion, topped with Hoisin sauce. The one below is wrapped around the filling, which peeks out from each end.

For my second loaf, I put about half the rye flour with all the water and let it ferment for around 18 hours. Then I added the remaining flour, rye grains and about 50 g of pumpernickel leftover from the last loaf. It was supposed to be grated but it was far too hard for my hand grater, and was almost too much for the grater attachment on my elderly food processor. Apparently the recipes that add grated pumpernickel used around 15% of the flour amount, which would have been more like 75g, but I went with what I had since some recipes don’t use it at all.

I didn’t bother with a second rise since it had already been fermenting for a long time and it doesn’t really rise anyway. Instead, I lined my new Pullman bread pan (a pan with a lid) and put it in the oven at 280F.

Took it out after just over 9 hours. It’s still just a dark brown, but the crust is softer (and it was bedtime so I was done with baking for the night). I left it in the pan overnight with the lid on.

The bread in its fancy new pan
Finished bread with a slice cut off for my breakfast.

As you can see from the finished loaf, the whole rye grains are very prominent. They are also quite chewy. For my next batch, I’ll either add them to ferment with the first batch of flour, or I’ll add a second fermentation period with all ingredients for at least 12 hours. The starter and grated pumpernickel made no discernible difference, so I may or may not bother with them in future. For a slightly softer loaf, I will either shorten the bake time by an hour or – if I want to try for a darker bread lower the temperature to 230F and leave it in for the same amount of time (or even a bit longer).

Recently, I had the pleasure of sitting in on most of a session on pumpernickel bread, led by food historian William Rubel (williamrubel.com). I missed some of the history as I was listening in from work over my lunch hour and kept getting interrupted. I look forward to seeing his write-up soon.

I did catch the bits about it being recorded from the 1700s or possibly the 1600s), and seen as coarse peasant food that was very good for the bowels. Somehow by the 1900s it had switched to being the base for very fancy open-faced sandwiches. Perhaps the switch was also related to its effect on the bowels, as ideas about what constitutes healthy food began to change? All I can say is that my bread was extremely filling!

William’s aim was to try and get as black a bread as possible, using only the simplest ingredients. That meant coarsest ground rye flour, malted whole grains of rye, water, and possibly some starter and/or grated pumpernickel from a previous loaf. The original loaves were often baked in huge batches in wooden pans over very long heat for many hours. The bread doesn’t rise much and the pans have covers to keep the moisture in.

Using William’s baker’s math and the fact the rye flour I could find came in 1 pound packages, here’s what I used:

Ingredients

  • 1 pound rye flour
  • 45 grams sourdough starter
  • 520 grams water just off the boil
  • 174 grams lightly malted rye grains (used for making blonde beers, from my local brewing supply shop)

William suggested you could start with all the water and half the flour, let it ferment for twelve hours and then add the rest of the ingredients and ferment it for a bit more before baking. I added all my flour at the same time and let it ferment for the day, then added the remaining ingredients and let it ferment overnight.

For heat, William suggested baking at somewhere between 285-330F in his initial post. Later, he dropped that lower temperature following new information. As a result, I started mine at 310F for three hours using a metal loaf pan lined with parchment paper and covered with aluminum foil.

It had barely started to change colour so I dropped the temperature to 170 with the intention of letting it bake overnight. I chickened out and turned off the oven after an hour and restarted it at 310 the next morning for another eight hours.

Pumpernickel bread after baking for three hours

When I finally took it out, it was very dark brown but not coal black. The top was getting crusty and once it had cooled it was hard to cut (though the centre was still soft). this tracks fairly well with the historic records of it being chopped with an axe!

The flavour was delightful – every bit as sweet as William had promised.

Finished pumpernickel loaf on a white plate

I have more flour and rye grains, and even a bit of the last loaf so will be trying the recipe again. I have ordered myself a Pullman loaf pan with a lid, which should help keep even more moisture in. Next time, I will try with only half the flour and all the water to start, and I’ll drop the temperature even lower, likely into the range of 265, and for a longer period.

Mack in May 2023, Micky Schoeltzke, a French textile dyer and weaver I follow, wrote about a Merovingian gathering she attended in Marle. As usual, there were loots of gorgeous pictures of her work, but one that particularly caught my eye was an odd bowl with multiple spouts. It was made for her by la Poterie des Grands Bois.

Pottery bowl with multiple spouts, surrounded by various textiles and textile tools. Photo used with permission.

Micky included this photo which gave me some clues about where to look for more info, and there is a whole article about it in NESAT VI.

A black and white drawing of a reconstruction of how the pot would have been used, with the information that it came from Grave 74 I. Pfakofen, which is near Regensburg in Germany.

Armed with a grave number and location, I found a colour image that looked very similar, with the information that it was found with a spindle and two whorls, that the grave was from the late 6th C and it is on display at the Historical Museum in Regensburg.


The finds from Pfakofen grave 74 provide an insight into yarn production. The spindle, the two whorls and the spout vessel were probably used to twist particularly fine threads. Spindle, two whorls, spout vessel. Pfakofen, Kr. Regensburg, grave 74. Last third of the 6th century. Bone, clay. Regensburg, Historical Museum. Photo: Condreanu-Windauer, Regensburg.
https://www.hdbg.de/frauen/fbc5-1ce.htm
A close-up of the original pot
My reproduction pot, made by Karina at https://www.horuseyepottery.ca

This week I was able to get a copy of Antja Bartel’s article “Das Tüllengefässvon Pfakpfen, Lkr. Regensburg – ein seltener Fund aus dem frühen Mittlalter, published in NESAT VI. I haven’t had time to read it in my painfully slow German, but I did study the drawings of the grave finds and skim through the rest. My pot may be a little too big, but is still reasonable.

The next thing to do is to make myself a suitable bone spindle and whorl (and get Karina to make me the clay whorl). The spindle is about 8 inches long with a tiny hook at the top. The bone spindle is about 1 inch at its widest, and maybe 3/4 of an inch tall. The clay whorl is one of those cylinders that come to a point at the “equator”, with flat top and bottom. It is about 3/4 of an inch at its biggest dimensions for both height and width. Obviously, I’ll take more careful measurements before starting to work, but I was excited to share this and I look forward to testing the whole assembly soon.

I never did get around to trying this plying method either. And I have been looking at other techniques and tools for making rope; maybe this is the summer I get back to playing with string.

At Crown Tournament, back in May, I had the opportunity to make scrolls for John Spooner and His wife Katrina Prebendstoddir when they were inducted into the Baronial order of the Friends of the Hare. Both are talented artists so this was quite intimidating (I wrote in my diary at the time that the project provoked bone-crushing anxiety. It was also my first attempt to use gouache paints, a step up from watercolours of the past.

The words for John’s were based on a 13th C Italian text and the other was 12th C Flemish, so I decided to use images and calligraphy that matched those times and places.

I had fun putting the collapsible table John built as a shield between the two Hares.

A calligraphed scroll with a line of leafy decoration along the left side and two brown Hares on either side of a circle painted with small red and blue diamonds.

Katrina had made a bunny-themed sideless surcote to wear at the Baroness’s Bunny Ball earlier that year, so I decided to find a way to include it in the design. I had completely forgotten to post about that event here, though I did write about it for another blog: Renaissance Dancing for Fun and Fitness

A double line of dancers facing away from the camera. Katrina is the last dancer on the right, wearing bunny ears and a green dress decorated with carrots.

The funny part was that Katrina wore that dress to the event. The fierce rabbits at the bottom are because she and John both enjoy axe and knife throwing.

My most recent attempt was for Sir Mordain Blackcloak’s induction into the Order of the Silver Hare. Mordain is one of the first people I met when I moved to Skraeling Althing back in 1985. The challenge here was a new-to me-script and so many words!

Calligraphed scroll with a fighter carrying a sword tucked into a large introductory red “T”, and a grey hare holding a large sword and Mordain’s tiny shield with his coat of arms at the bottom.

Gunner’s mitts, or trigger mitts, are traditionally knitted and working in Newfoundland. I love them because the colour work makes them very thick, and the separated finger makes them extremely versatile. On top of that, there are so many designs available.

I bought my first pair on my first trip to Newfoundland, over 20 years ago. I lost one of the mitts years ago, but hung onto the other hoping I would figure out how to replicate the pattern. Eventually I found a book that had a pattern (Favourite Mittens, by Robin Hansen).

It didn’t have the exact pattern of my mitt, but I did make several pairs using other designs it offered. Finally, over a year ago, I lost the first pair I made and decided I needed a new back-up pair. It was time to see whether I could replicate that design.

It didn’t work out quite as beautifully as I had hoped, since the number of stitches in the original was more than my pattern used, and I knew my pattern fit my hand really well. I managed to hide most of the odd bits in the palm so they are less visible.

Lakes for Painting

Over a year ago, I bought some dye materials with grand plans to get back to dyeing. That never happened, but I always look forward to Micky’s blog post so I can be inspired. This one struck my interest because my friend Elsebeth Ffarberyn (https://kithandkinsite.wordpress.com/) is a painter who has experimented with making her own paints. Her class on painting with egg tempera was very cool and I would like to try doing it again. She has also run many Zoom paint nights so that we could practice painting portraits of other friends in medieval clothing. I have a lot of fun at them, and now I am tempted to get back to dyeing just so I can have leftovers that I can turn into lakes.

Another delayed post, I’m afraid, but I am slowly catching up. Feast of the Hare is held in early November every year, and I was asked to prepare the lunch, with no particular theme in mind. I settled on Ottoman, as I had quite a few good cookbooks and recipes I had been wanting to test.

Ottoman cooking has lots of vegetarian and gluten-free options as well, and I wanted to provide a lunch that did not have obvious “substitutions for the real thing”. All but one dish was vegetarian, most were vegan, and I kept all but one gluten-free. I think it worked, as at least one vegetarian commented about how pleasantly surprised he was to crave a full range of choices, and the meat eating types also went away satisfied.

I relied heavily on 500 Years of Ottoman Cuisine and Bountiful Empire as my main sources. I used some of the redacted recipes in 500 Years, but used modern recipes for dishes that had no ingredients inappropriate for 16th C Turkey when I only had literary references or kitchen accounts to go by.

Pickled turnips and beets. https://www.themediterraneandish.com/pickled-turnips/. The Ottomans had both pickled turnips and pickled beets, so I did them together. The olives were purchased.

Pickled cucumbers (500 years of Ottoman cuisine). These had a really interesting flavour because they were only lightly pickled, and used fennel for flavour.

Kofta Kebabs https://www.panningtheglobe.com/grilled-turkish-kofta-kebabs/. I had several redacted kofta and kebab recipes, but lamb was beyond my budget so I went for a modern beef version.

Green rice and chickpea soup (both from 500 years of Ottoman Cooking). The cinnamon in the soup gave it a really rich, complex flavour. It’s rare to have people coming back for seconds of soup or asking for the recipe, but I did for this.

Pide https://www.turkishfoodtravel.com/2021/12/08/turkish-pide-pizza-recipe/?amp. I did one version with cheese and another with spinach and onion. They are much smaller than the original recipe, so that I could serve them as individual portions, rather than a huge thing that would be sliced and shared family-style. They were a lot of fun to make.

Zerde (500 years of Ottoman Cooking). Zerde is the dish that got me interested in doing an Ottoman meal. This creamy rice pudding flavoured with saffron and rosewater was a treat I got to try every time I went to Afghanistan (flying on Turkish Airlines, and often with a stopover in Istanbul). This was another dish that won converts among the crowd who hates rice pudding, as the texture and flavour profile is nothing like a mid-century rice pudding made with milk and containing swollen raisins.

More Pickled Purslane

The purslane grew particularly large this year, so I was able to harvest enough for another recipe test. Several English herbals from the late 16th C mention purslane in vinegar but I went with a 17th C recipe. There were two of interest: one used salt and the other used sugar along with the vinegar. I prefer briny pickles to sweet, but had already preserved some purslane in salt, so decided to try the following recipe, which comes from the blog Give It Forth. Unfortunately I don’t have access to the whole cookbook as it is not available to me on-line, and I couldn’t find a copy of the 2010 printed version. No matter: the recipe itself is quite straightforward.

Purslain pickled. (The English And French Cook, 1674)

Gather them at their full growth, but not too old, parboil them and keep them in White wine Vinegar and Sugar.

I did change the recipe a bit on the advice of the blog author, and used apple cider vinegar instead of white wine vinegar.

A canning jar filled with pickling liquid and green purslane stems against against a grey background.